In the pursuit of maximum visibility, too many sellers neglect keyword optimizing their product listing.
You’ve performed product research and found the perfect product to sell. You found the right manufacturer. You’ve created your Seller Central account and are ready to start your FBA career. Next up: Product Listing Optimization.
It’s time to get down to business on your Amazon marketing strategy! That begins with making sure your product listing is set up for maximum visibility and able to convert shoppers to buyers.
We consider your product images and copy to be the foundation of a successful Amazon marketing plan. Every aspect of your selling experience will benefit from high-quality images and sales-inducing copy optimized for search.
Although many don’t think of Amazon as a search engine, that’s precisely what it is.
Amazon is responsible for roughly half of all e-commerce sales, and nearly 90% of Amazon’s product views come from searches.
Is your listing optimized to take advantage of this humongous audience?
Sellers who don’t optimize their listing to reach all the customers for their product are not only leaving sales on the table; they’re encouraging customers to buy from competitors, resulting in ranking changes that further minimize your visibility. Whether creating a new listing or enhancing your existing listing, Viral Launch’s Keyword Research tools are all you need to maximize visibility, increase exposure, and most importantly — boost sales.
STEP 1: Find your seed keyword
First, we’ll need to determine our seed keyword. In the Amazon world, this would be the most relevant keyword that has the highest search volume. In other words, the most popular term that customers are using to find your product on Amazon.
Think about the product you want to sell. If you were a customer, what would I search for my product to show up as a result?
For some products, this is as simple as it sounds. But for others, it can be trickier than you’d think.
Consider soft drinks. Is it soda, pop, or are you like me and use “Coke” as a catch-all for every fizzy beverage? Without a doubt, this likely depends on where you’re from or where you currently live.
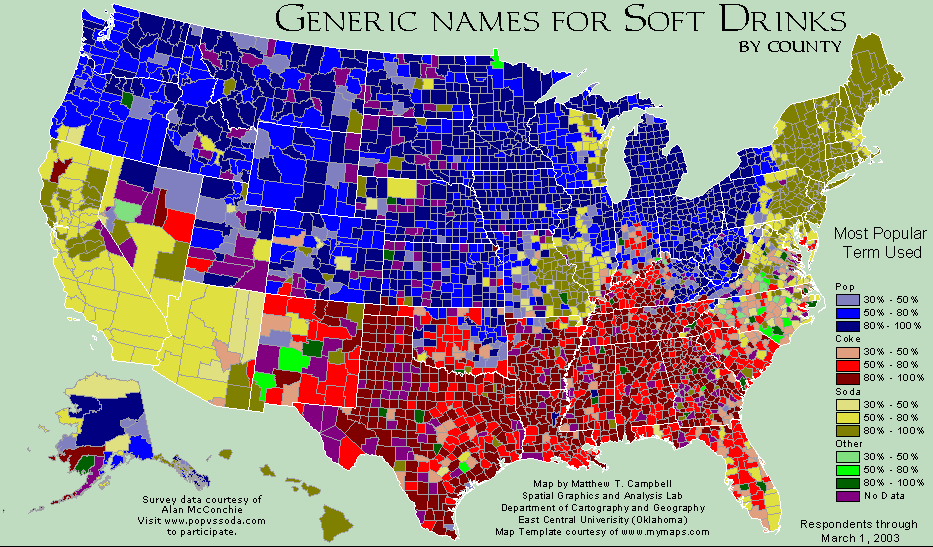
From this example, you can see how colloquial language can change depending on geography and how the same product may have a few different primary keywords.
Finding the right seed keyword is one of many reasons why Viral Launch’s Keyword Research tool is a must-have for writing your listing. Filled with years of search volume data, Keyword Research makes the process of finding a seed keyword and knowing your primary keywords a simple one.
For the remainder of our SEO exercise, Keyword Research plays a huge role not only regarding what keywords we use but where we place them. The proprietary keyword metrics such as Priority Score, Relevancy Score, and Opportunity Score provide valuable insights for us to draw from and prioritize our keywords.
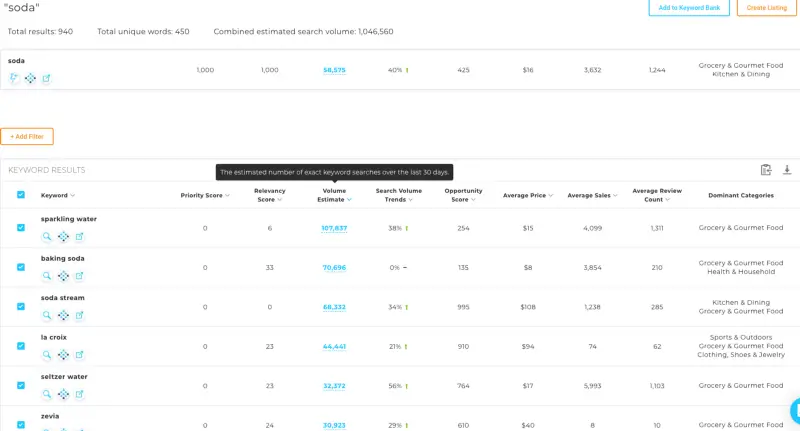
Dig around with keyword research before deciding upon your seed keyword. You may be surprised at what keywords fetch the most searches for your product.
Step 2: Find Relevant High-Volume Keywords
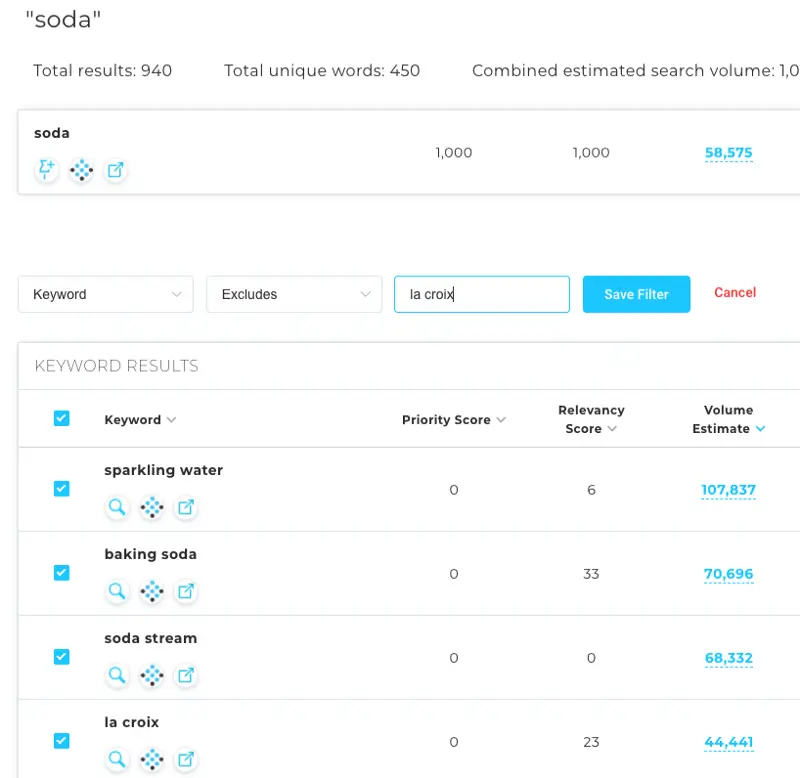
Filter out keywords that aren’t relevant to your product. Use the filters to customize your keyword list, removing competitor brand names and any keywords that don’t apply to your product.
After you’ve found the right seed keyword, you’ll have a comprehensive list of related keywords along with helpful data points such as Viral Launch’s exclusive Priority Score and Relevancy Score. We recommend sorting by search volume estimates, as these are going to be where much of the traffic via search.
Sort this list by search volume estimates to get an idea of what keywords or phrases people are using to find your product. Since search volume estimates are an incredibly powerful indicator of consumer demand on Amazon, we can quickly see which keywords are being used to find your product and the depth of the market.
Ensuring that your product is indexed for the majority or all of your keywords are the first step in making sure your listing shows up for customers. Without indexing for these keywords, achieving sustainable sales is an uphill battle, to say the least.
As you filter through your list, you’ll find keywords that don’t apply to your product, such as competitor brand names. Unless you’re selling one of these brand names, it’s best to remove them entirely from your keyword list.
How to Filter
We recommend using the “Keyword Excludes” filter to take irrelevant or inapplicable keywords for maximum efficiency. Due to Amazon’s robust size, it’s impossible for a machine to automatically pull a keyword list ONLY related to your product. But the “Keyword Excludes” filter allows you to take out keywords that do not apply to your product. Once completed, you’ll have a keyword list made exclusively for your product.
In the image listed for this step, you’ll see I’m filtering out “La Croix” since that is a competing brand. Further down the list, this brand name is mentioned multiple times. Filtering it out just once will get rid of all mentions of “La Croix” with that exact spelling.
For the same reasons we remove results with competitor names, you’ll want to eliminate other results that aren’t relevant to your product, such as size, color, dosage, or product specifications that don’t apply to your product.
Once you’ve finished filtering, put these keywords into action by adding them into your listing’s copy. You can do this yourself OR use a tool like Listing Builder to make the process much more streamlined.
STEP 3: Piece It All Together
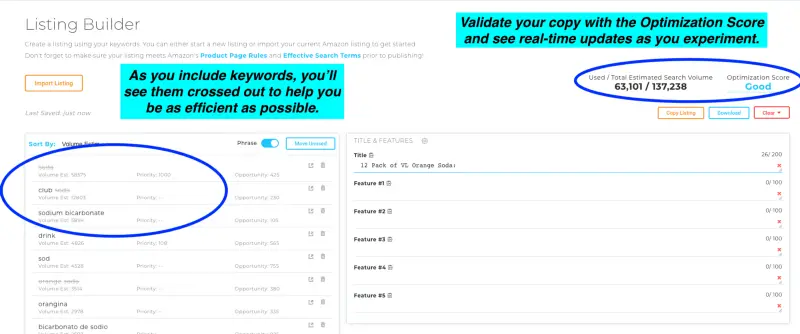
The beauty of Listing Builder is that it allows for experimentation with your listing’s copy and enables real-time feedback for you to see how each change affects your listing.
Creating a listing can feel a lot like putting a puzzle together, and Listing Builder empowers you to move the pieces around to see what works.
You’ll see your filtered-down list of keywords, sortable by search volume estimate, priority score, and opportunity score. On the right, you’ll see the fields for an Amazon listing that you can use without affecting your actual listing.
As you type each keyword in, you’ll notice that each keyword will be crossed off your list. This feature assists you to be as space-efficient as possible with your listing. Likewise, Amazon doesn’t place extra weight on keywords for repeated use, so once you’ve used it once, there’s no need to add it again for SEO.
Know your (character) limits
Your product listing has a character limit for title and bullet points, typically between 50 and 200 characters for each. Your limit depends on what category Amazon recognizes your product as, and this can play an enormous impact on how you execute your strategy.
If you include your brand name in your title to align with Amazon’s style guide, 50 characters become even less. Product listings with 50 character titles will have to be more “meat and potatoes” while extended character limits allow more room for sales-inducing, descriptive language.
Across all listings (except for listings with EBC), you will have up to 2000 characters to use at your discretion.
HOOK CUSTOMERS IN WITH YOUR TITLE
You never get a second chance to make a first impression, and your title is the first impression on the shopper. A thoughtfully crafted title and a professional main product image are a recipe for you to get customers to choose your product over the other search results.
Amazon recommends starting your title with your brand name. We always recommend meeting their style guidelines to ensure you don’t get your listing suppressed.
Staying within their guidelines can be a pain and stand in the way of the keyword or phrase you’re just dying to fit within your limits. But we must remember this is only part of doing business since not following the guidelines can defeat the purpose of optimizing the copy in the first place.
DON’T BE A BOT

A common mistake that sellers make is keyword stuffing. Keyword stuffing describes including as many keywords as possible without regard for readability or sense. Not only is keyword stuffing against Amazon-style guidelines, but it’s also not shopper-friendly.
Nobody wants to read your keyword list, so don’t make it your product listing! All too often, sellers use various keyword stuffing methods and see great optimization scores, but wonder why their product isn’t selling.
Writing a keyword-optimized listing is both an art and a science. It requires the science of search data with the art of integrating these keywords into your listing in sales-inducing language.
Ideally, your listing is indexed for each and every keyword on your list. Depending on character limits and how many keywords are relevant for your product, this might not be possible. But don’t panic! This underlines the importance of being strategic with which keywords get left on the cutting room floor.
Our end goal is to increase rank, which occurs when you achieve sales through searches for keywords that you’re indexing for. Don’t get too caught up writing to the algorithm! Remember the goal is to inform and market to the reader you’re trying to convert to a customer!
MAKE SURE YOUR BULLET POINTS HAVE BITE
Once your title has been expertly crafted, the bullet points should be next up on your order of operations. This is where customers get to know your product. What’s unique about it? What sets it apart from the competition?
The bullet points are an excellent place to boast selling points and add keywords that couldn’t be squeezed into the title. Most listings will include five bullets, so think about 5–7 selling points of your product. Prioritize them, and place them in a way that makes the most sense.
Sticking with our fictional soda example, let’s highlight a few of the selling points to start it off.
- TASTE THE TROPICS: Quench your thirst with a can of our refreshingly sweet, all-natural orange soda
Within 100 characters, we caught the shopper’s attention with a catchy slogan, informed the customer it comes in a can, and highlighted two major selling points for our fictional orange soda: it’s refreshing and completely natural.
We’re answering customer questions while addressing a few primary benefits of this particular soda. We’ve used a few crucial keywords as well, all without appearing to stuff them unnaturally.
CLOSE THE DEAL WITH A KILLER PRODUCT DESCRIPTION
The customer found your product and liked what they saw with your title and header image. They saw your bullet points, and they haven’t left looking for competitor products. You’ve got this customer on the hook.
Now close the deal.
Psychologically, the customer is looking for a final reason to buy or not buy your product. Answer any potential questions they may have. Show and tell the customer why your product is superior to others on the market.
Your product description likely has a 2000 character limit and offers minimal indexing weight. But do not make the mistake of ignoring this section because it won’t increase your visibility.
The longer character limit and lack of indexing weight make this area ideal for describing your product’s selling points.
Take on the mentality of a customer. What’s in this product? How is it made? What sets it apart from Competitor X? How does this product make my life better?
Answering these questions could be the difference between a customer adding to cart or starting their search over again.
DON’T SKIP THE BACK-END SEARCH TERMS
Sellers frequently make the mistake of leaving their back-end search term areas blank! Just because customers can’t see them doesn’t mean they don’t have value.
The backend search term fields are a terrific way to grab “low-hanging fruit” in the form of relevant search terms containing common misspellings or search queries made in foreign languages. Toss those lower relevance keywords that you weren’t able to squeeze into the title or bullet points here.
The backend search-term field is a lifesaver for including keywords that wouldn’t make sense to include in a product listing such as common misspellings and Spanish phrases.
Importantly, leaving this area blank willingly misses out on thousands of searches each month and the sales that come with them.
Also, you’ll see optional areas to fill out, such as Intended Use, Target Audience, Other Attributes, and Subject Matter as backend fields. While we have found no significant correlation between these fields, Amazon occasionally tweaks its algorithm.
Despite the lack of tangible benefits, we recommend filling these fields in case these fields come into play later.
In Conclusion
An expertly crafted, keyword-optimized product listing makes you more likely to land you on the coveted Page One of results. Of course, this comes after sales trickle through via the keywords you’re indexing for. Then, you’ll see your rank improve so you can start receiving
Both inexperienced and veterans sellers should optimize their product listings for maximum performance. Optimizing your product listing by keyword is a tactic that rookie and experienced sellers alike should be doing. Trends change, so it’s worth monitoring your keyword performance and optimization score every few months. Monitoring keywords keeps you on top of your game and give your product detail page an edge over the competition.
With Keyword Research and Listing Builder, it’s never been easier for sellers to create their keyword-optimized product listing. If you have any questions about Amazon’s guidelines, their product page style guide comes in handy.
Additionally, our customer support team is always willing to help provide clarity. Sign up today and enjoy our 7-day money-back guarantee, no questions asked.
Want the latest Amazon news and updates sent to your inbox? Sign up below!


