“How do I add my products to Amazon Seller Central?”
First off, congratulations! Because if you’re asking this question, it means you’re taking the plunge and starting your Amazon selling journey!
Kicking off your Amazon journey as a beginner can be daunting, and that’s a big part of why we exist! In this comprehensive guide, we’ll walk through how to add a product on Amazon and how to list a product in Amazon Seller Central. By the end of this article, you’ll not only know how to list items on Amazon but also how to create an Amazon seller listing that attracts customers and drives sales.
Without further ado, let’s dive into how to add a product on Amazon Seller Central!
How To Add Products on Amazon Seller Central: Step-By-Step Guide
Before you dive into creating your product listing on Amazon, there are a few essentials you need to have in place:
Amazon Seller Account
Before adding any products, you’ll need to take care of two foundational elements of selling on Amazon:
- An active seller central account (step-by-step guide to creating a seller central account)
- Choose between individual or professional seller account
Before setting up an account and selecting a plan, Amazon won’t allow you to start uploading products to Amazon Seller Central, which makes it available for purchase.
Product Identifiers
Product identifiers are the unique codes that help Amazon (and customers) distinguish your product from millions of others. These include:
- UPC (Universal Product Code)
- EAN (European Article Number)
- ISBN (International Standard Book Number)
- ASIN (Amazon Standard Identification Number)
If you’re selling a product already on Amazon, you’ll use its existing ASIN during the Amazon seller account product setup to successfully add items to your inventory. For new-to-Amazon products, you’ll typically need to provide a UPC or EAN so your product can be tracked and managed in Amazon’s massive product catalog, enabling proper tracking in Amazon warehouses and making it easier to receive payouts in a timely manner.
Where to Find or Obtain UPC Codes
- Existing Products: If you’re reselling products manufactured by other companies, the UPC is usually printed on the product packaging, often near the barcode.
- Your Own Products: If you’re manufacturing your own products, you’ll need to purchase UPC codes. Here’s how:
- Buy directly from GS1 (Global Standards Organization): Visit GS1 US for U.S. sellers or your country’s GS1 website. This is the official and most reliable source.
- Exemptions: In some cases, Amazon may exempt you from the UPC requirement, particularly for private label or handmade products. You’ll need to apply for a GTIN exemption through Seller Central.
Pro Tip: Confused about the difference between FNSKU and ASIN? Our guide on Amazon FNSKU vs. ASIN breaks it down for you.
Product Information and Images
When filling out product information in Seller Central, gather all the necessary details about your product, including:
- Product name
- Brand name
- Description
- Bullet points highlighting key features
- High-quality images (main image and additional photos)
- Pricing information
- Any relevant attributes (size, color, material, etc.)
Remember, the quality of this information can significantly impact your product’s visibility and conversion rate. That’s why thorough keyword research is crucial for optimizing your titles and descriptions. We’ll go into much greater detail on these aspects shortly, including how to maximize SEO and set up your listing to convert that visibility into sales.
Pro Tip: Want to supercharge your keyword strategy? Check out our Amazon Keyword Guide for insider tips and tricks.
How to List an Existing Product on Amazon Seller Central
Once you have all the information ready, it’s time to start listing products on the Amazon marketplace. Below, we’ll dive into how to add a product on Amazon step-by-step, with instructions for listing products on Amazon for new and existing items in the Amazon marketplace. If you’re selling a product that’s already available on Amazon, here’s how to add products to your Amazon store:
- Log in to Seller Central: Navigate to your Seller Central dashboard.
- Access Inventory: Click on “Inventory” and select “Add a Product.”
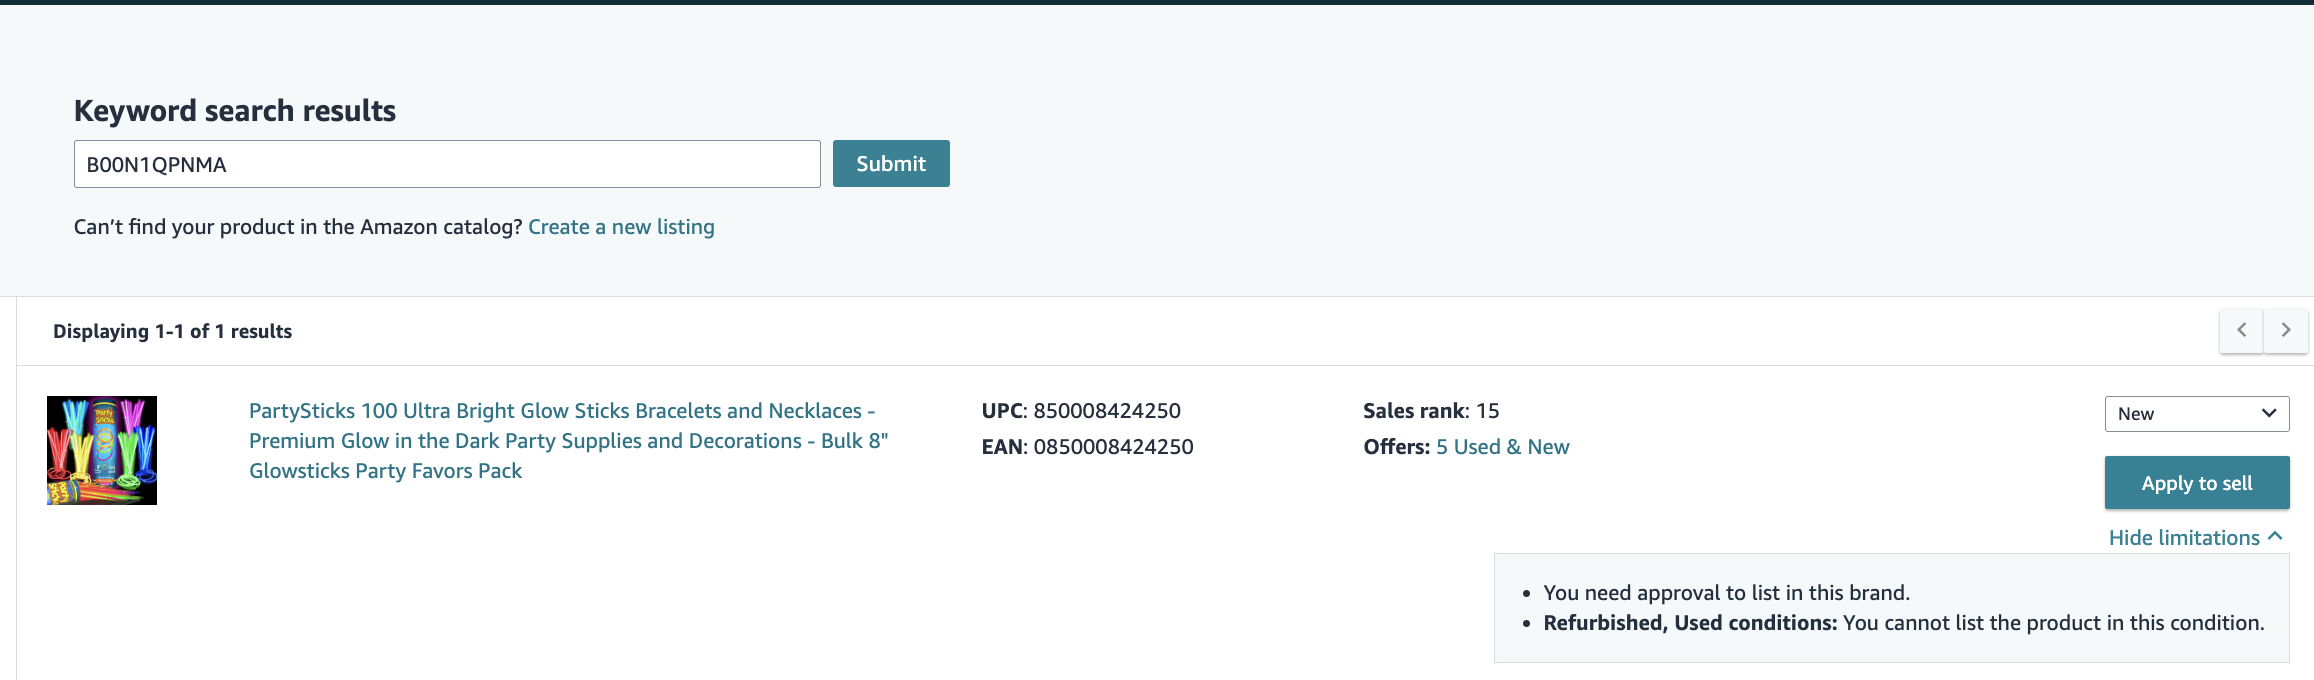
- Search for the Product: Enter the product name, UPC, EAN, or ASIN in the search bar.
- Select the Correct Product: From the search results, choose the exact product you’re selling.
- Enter Offer Details: Provide information about your offer, including condition, price, and quantity.
- Review and Submit: Double-check all the information and click “Save and Finish” to add the product to your inventory.
Voila! That’s how to list an Amazon product and add it to your store’s inventory, making it available for customers to purchase.
How to List a New Product on Amazon Seller Central
The process remains virtually the same for how to add a new product on Amazon Seller Central, but with a few key differences. To add a new product on Amazon, follow these steps:
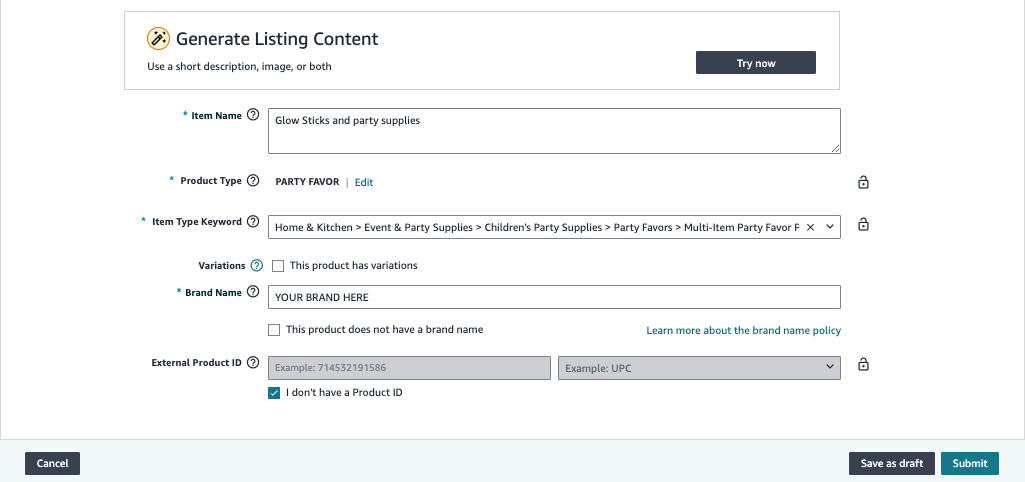
- Access the “Add a Product” Tool: In Seller Central, go to “Inventory” > “Add a Product.”
- Create a New Product Listing: If you can’t find your product, click “Create a new product listing.”
- Select Product Category: Choose the most appropriate category for your item.
- Provide Product Information: Fill in all required fields, including:
- Product name
- Brand
- Product ID (UPC/EAN)
- Key product features
- Product description
- Keywords
- Images
- Set Your Price and Quantity: Enter your selling price and available inventory.
- Choose Fulfillment Method: Decide between Fulfillment by Amazon (FBA) or Fulfillment by Merchant (FBM).
- Review and Submit: Carefully review all information for accuracy and submit your listing.

Once you’ve finished uploading products to Amazon Seller Central, the job is almost finished, but there’s quite a bit of work remaining. Perhaps most importantly for products new to the Amazon marketplace, it’s time to create a product listing in Seller Central, with the intent to boost visibility, inform potential customers, and convince customers to purchase your product.
For sellers looking to maximize their product visibility and streamline their listing process, tools like Viral Launch’s Listing Builder can be a game-changer. Let’s explore how this tool can transform your approach to creating Amazon listings.
Use Viral Launch’s Listing Builder Tool To Create Optimized Amazon Listings
While manually creating listings is certainly an option, why not leverage cutting-edge tools to streamline the process and boost your chances of success? Enter Viral Launch’s Listing Builder Tool—a game-changer for Amazon sellers looking to create data-driven, optimized listings.
How To Get Started With the Listing Builder Tool
The Listing Builder tool streamlines Amazon product listing optimization by combining keyword research with real-time guidance. Follow these steps to avoid common Amazon Seller Central product listing mistakes and maximize your listing’s potential:
- Access Keyword Research: Log into your Viral Launch account and navigate to the Keyword Research tool. Don’t have an account? Get started today and enjoy our 7-day money back guarantee!
- Find Your Seed Keyword: In Keyword Research, conduct searches that a customer might use to find your product, emphasizing finding the main keyword that strikes the perfect balance between relevance to your product and search volume.
- Filter Your Keyword List: Once you’ve found your seed keyword, it will populate a comprehensive keyword list. However, you’ll likely find keywords that don’t match your product. Those can and should be removed from your keyword list.
- Import To Listing Builder: After removing the irrelevant or inapplicable keywords, select the Import button at the top-right of your screen. This imports your keyword list into Listing Builder, enabling real-time updates as you integrate the remaining keywords into your listing.
- Start a New Listing or Import Existing: Create a new listing from scratch or import your current Amazon listing for optimization.
- Enter Product Details: Input basic product information like title, brand, and images.
- Utilize Keyword Suggestions: Our tool will provide data-driven keyword suggestions. Incorporate these into your title, bullet points, description, and backend keyword sections.
- Optimize Your Content: Use our real-time optimization score to guide your listing creation. Aim for a perfect score by utilizing keywords with search volume in the high-value spots in your listing.
- Preview & Refine: Use the preview function to see how your listing will appear on Amazon. Make adjustments as needed.
- Export Your Optimized Listing: Once satisfied, export your listing directly to Amazon or as a file for later use.
Final Thoughts on Adding Products to Seller Central
Creating effective, optimized product listings on Amazon is crucial for gaining visibility and converting potential buyers into loyal customers. By following the step-by-step process of how to add a product on your Amazon seller account outlined in this guide, you’ll be able to add both existing and new products efficiently.
Amazon makes it quite easy and simple to add products to your storefront, and with tools like Viral Launch’s Listing Builder, you can optimize much of this process and set up your online business for long-term success. Because the process of how to add products in Seller Central is quite straightforward, it can be easy to overlook the importance and breeze through adding products to your storefront. We highly recommend locking in during this process and not taking the procedure for granted, as proper setup is crucial for hitting the ground running with a new product.
Don’t feel ready to take the leap on Amazon quite yet? No worries! Our free How To Sell on Amazon eBook for beginners has everything you could want to know, including tips and tricks from industry leaders who successfully made the leap from employee to entrepreneur on Amazon.
As always, we’re here to help you every step of the way! Make sure to sign up today and gain unlimited access to our industry-leading tools like Product Discovery, Market Intelligence, and advanced tracking tools to give you the edge over the competition to climb the Amazon ranks and supercharge your Amazon business.