You’ve probably heard of the saying “A picture is worth a thousand words” before. In the Amazon space, this phrase especially holds true for sellers when they list their products. Our brains process visual information 60,000 times faster than text, so words can only convey so much in the limited time you have to attract potential customers. Online shoppers might remember a few details they read here and there, but including photos will ultimately enhance any information and draw more attention to the product page.
However, not just any photo will do the trick. There’s a lot of competition in the Amazon marketplace, so you’ll need to have high-quality product images and infographics to convince shoppers that your product is worthy of purchase. In this article, we’ll go over all there is to know about Amazon product photography including technical requirements and guidelines, tips, outsourcing, and common mistakes to avoid.
Why is Amazon Product Photography so Important for Sellers?
As a seller, you only have a few seconds to capture the attention of and impress potential customers. Likewise, having the ideal photo plays a significant part in the moment when online shoppers decide whether to click on your product link or your competitor’s. Aside from the general importance of including photos, here are a number of specific reasons why product photography for Amazon is so important:
- Builds trust and credibility: Using low-quality photos can reflect poorly on not only the product itself but the brand overall. On the other hand, showcasing your product professionally and appealingly can help shoppers feel confident in their purchases and build trust in your brand.
- Provides transparency: Customers aren’t able to view the product in person, so they need to know exactly what they’re purchasing. Providing detailed images that show every angle will give shoppers the transparency they deserve.
- Impacts sales and conversion rates: High-quality Amazon product images are essential to differentiate your brand among other competitors in the marketplace and attract potential customers. Online shoppers are more likely to choose products with clear and high-resolution images.
- Establishes brand identity: It may be easier and tempting to use generic photos from your supplier or the internet. However, creating unique and brand-specific images will help create a strong brand identity that allows you to stand out among the competition.
- Boosts organic rankings: Amazon’s search algorithm accounts for the quality of product images. To increase your chances of visibility among potential customers, you must use high-quality images that are clear and align with Amazon’s technical specifications.
Pro Tip: For more information on how to maximize visibility and increase conversion rates on Amazon, check out our Amazon Listing Optimization Guide and article on 7 Tips to Quickly Increase Your E-Commerce Conversion Rate.
Amazon Image Requirements
As with many things, there are rules and regulations to be aware of. In the Amazon marketplace, images must follow a set of general and technical requirements in order to display properly and accurately for customers. Below are some Amazon image guidelines to consider when you’re planning images to include in listings.
Technical Specifications
All Amazon product images must:
- Be 500 px to 10,000 px on their longest side (1,600 px or larger for optimal zoom experience)
- Be provided in JPEG (.jpg or .jpeg), TIFF (.tif), PNG (.png), or non-animated GIF (.gif) file formats
- Be clear and unpixelated with no jagged edges
Amazon also requires that every product must have at least one image, preferably images in the JPEG file format and larger than 1,000 px on each side to allow for zoom (which has been shown to enhance sales). It’s also recommended to have at least six images and one video of the product.
Additional Image Guidelines
All product images for Amazon must:
| Main Product Images | General Content |
| Accurately represent the product realistically and professionally (no placeholder images allowed) | Accurately represent the product being sold |
| Have a pure white background (RGB color values: 255, 255, 255) to allow for consistency across search and product detail pages | Match the product’s title |
| Show the product as 85% of the image | Not contain elements of nudity or be sexually suggestive (including both models and drawings) |
| Exclude text, logos, borders, color blocks, watermarks, or other graphics covering the product or in the background | Not display children’s clothing on a human model |
| Show all product pieces relative in size, with no one piece enlarged | Not include customer reviews, five-star imagery, claims (e.g. free shipping), or seller-specific information |
| Display the entire product within the image frame | Not include text or pricing details |
| Not show any accessories or props that aren’t included with the purchase as that may mislead customers | Not include any Amazon logos or trademarks, variations, modifications, or anything confusingly similar to Amazon’s logos and trademarks. This includes, but is not limited to, any words or logos with the terms “Amazon,” “Prime,” “Alexa,” or the Amazon Smile design. |
| Not include packaging unless it’s an important product feature (e.g. a gift basket) | Not include any badges used on Amazon, or variations, modifications, or anything confusingly similar to such badges. This includes, but is not limited to “Amazon’s Choice,” “Premium Choice,” “Amazon Alexa,” “Works with Amazon Alexa,” “Best seller,” or “Top seller.” |
For more details, you can check out Amazon’s Product Image Requirements article on their website.
Types of Product Images
Amazon product photography includes a variety of different photo types, with each kind having its own importance and best practices. Below is a list of common image types you should know about when setting up a product listing:
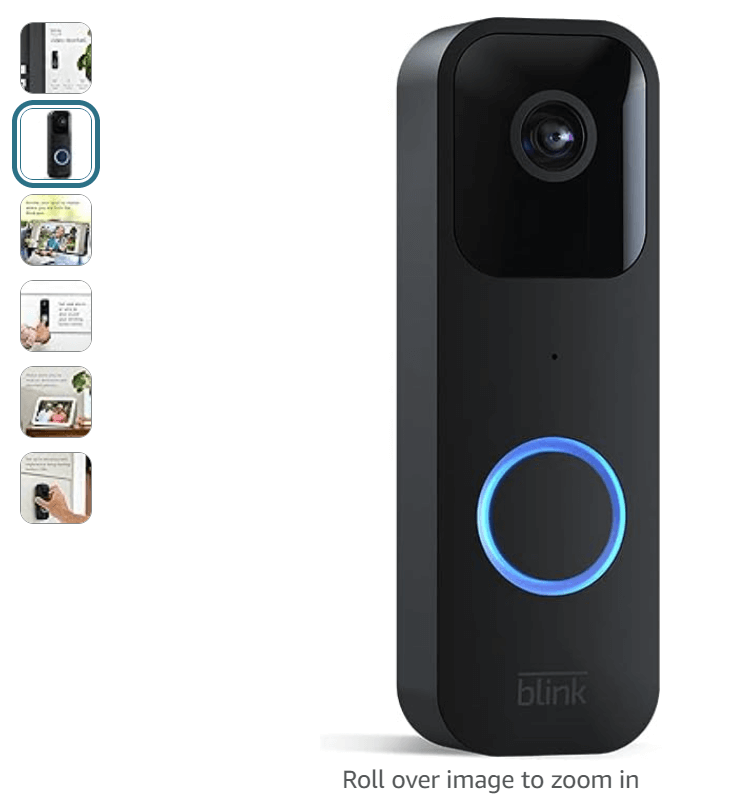
1. Main Product Images
The main product image is simply the first image on the product detail page. This image is also what customers first see when scrolling through the search results page. As we mentioned before, competition on Amazon is typically high, so in order to stand out from the rest and increase your click through rate, you’ll want to avoid a bland image that blends in with the others.
We recommend using a clear, bright, high-resolution, and high-quality photo that displays your product at an appealing angle. Use competitors’ main product images as a starting point and look for ways to improve and make yours even better.
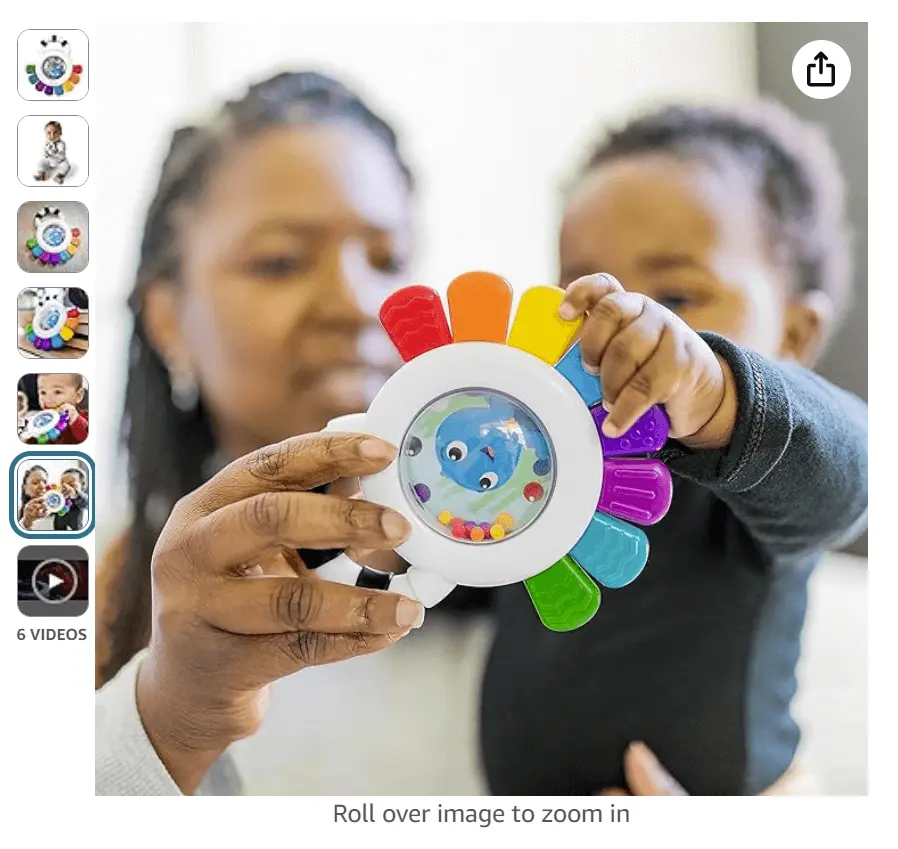
2. Lifestyle Images
Lifestyle photography is designed to create context and show how a product can be used in real-life settings. In other words, it helps potential customers imagine themselves using your product in their daily lives. This type of photo is especially important because it can create an emotional connection to online shoppers looking for the ideal product and ultimately impact their purchasing decision.
For lifestyle photos, it’s best to keep your target audiences in mind when creating them. Incorporate individuals who might resonate with your target customer base and capture moments of them using the product in a natural setting. For these images, you don’t necessarily need a professional camera; using your phone is perfectly fine as long as you consider the right angles, lighting, framing, and zoom.
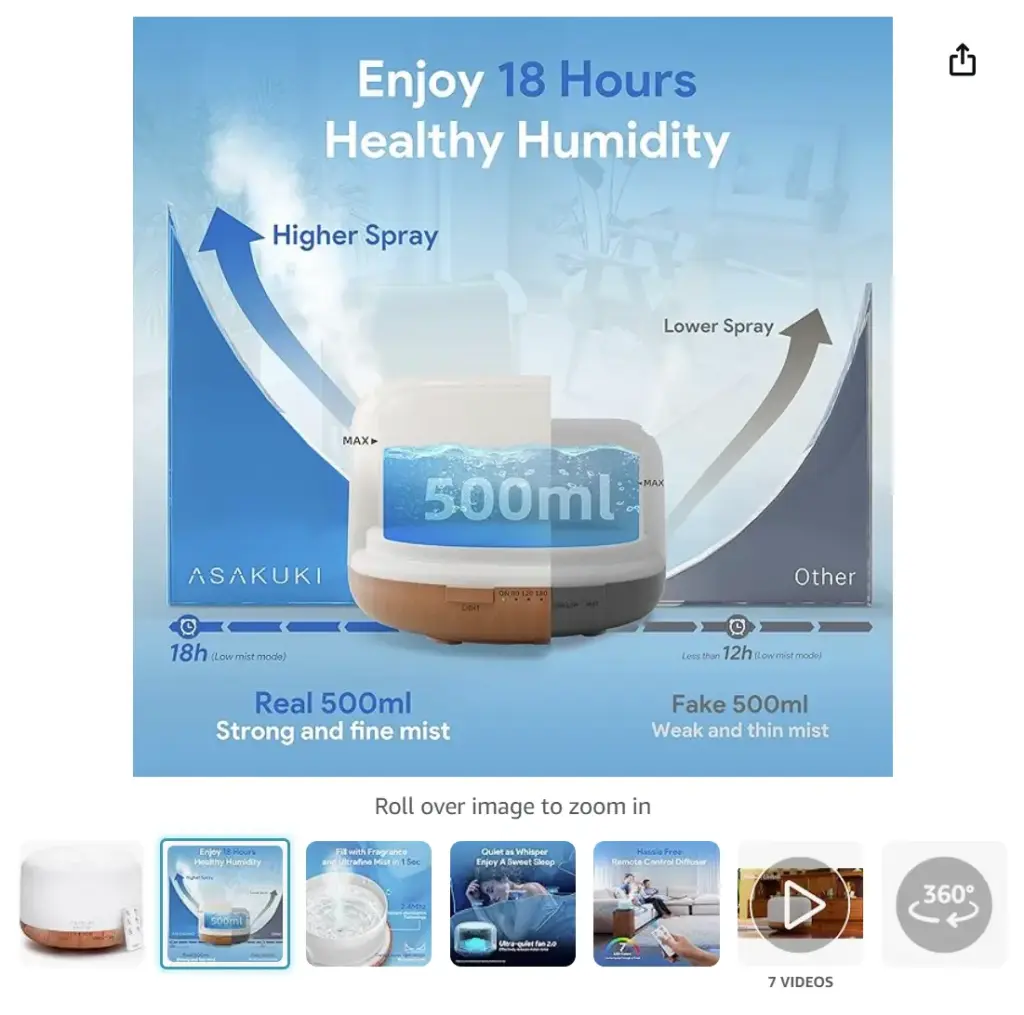
3. Infographics
Amazon product pictures can also include infographics to help highlight certain features and benefits of your product within the image. While customers can simply read this information in the product description, including an infographic can be more engaging for them as they look through the product images.
Remember that only the main product image needs to have a white background, so you have more creative freedom when designing infographics. If you want to make your images more engaging, consider adding informative text, graphics, and a colorful background. Whatever design choices you make, adding infographics are a great way to educate potential customers about your product and increase conversion rates.
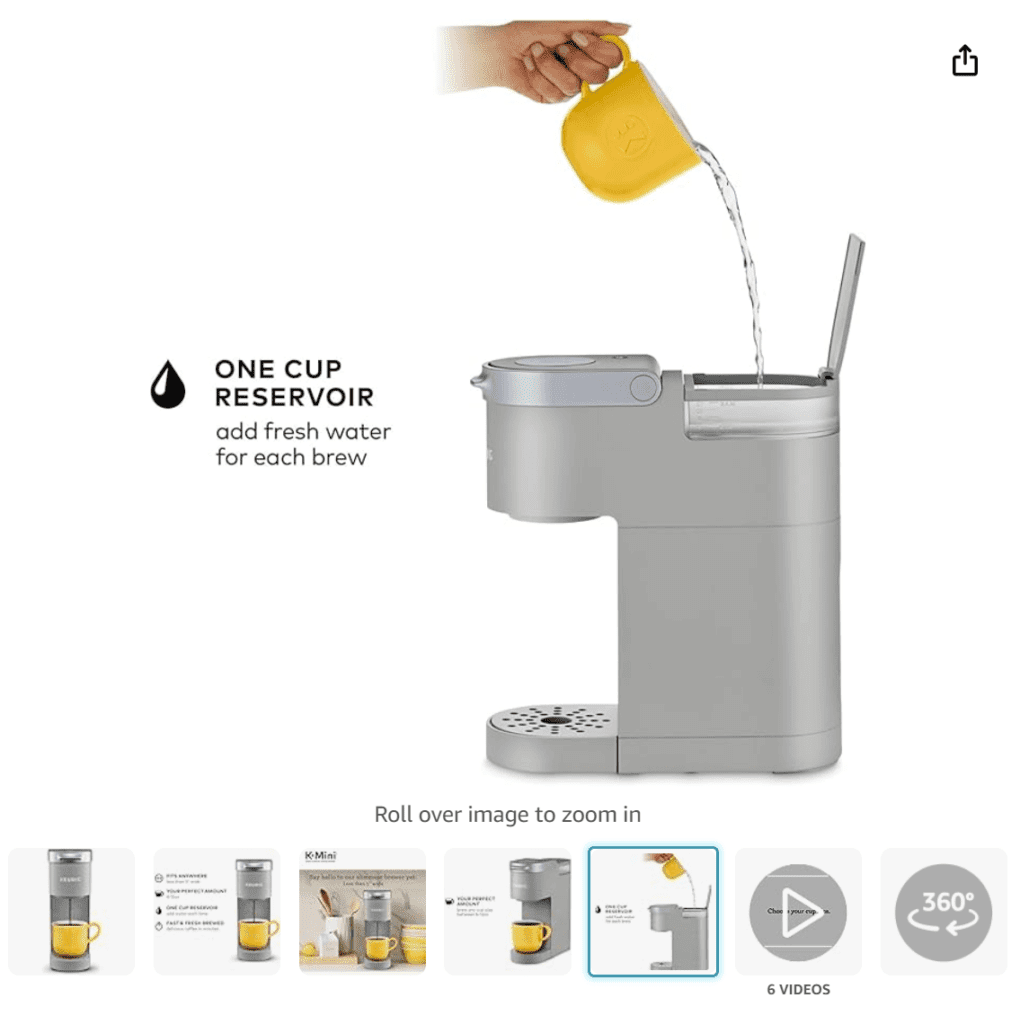
4. Products in Action Images
Some Amazon listing photos also include images that show the product in use to demonstrate its functionality or benefits. Products in action images are particularly helpful for products that require more explanation, such as tools or equipment. Depending on your product, you might consider using a hand model or full body model to help customers visualize how the product can meet their needs. When creating this type of image, always be sure to have adequate lighting and capture the right angles to showcase the product in use as best as possible.

5. 3D Content
You may have noticed before that some product listings include 360 degree images which allow shoppers to view a product from different angles, offering a more interactive experience. This is especially useful for products with complex features, such as electronics. However, Amazon announced in the beginning of 2024 that new requests to upload 360 degree image content will no longer be allowed, and 3D models will only be accepted going forward. Since Amazon has rolled out the new change, they’ve provided a tool on the Amazon Seller Central platform to help sellers create and upload 3D models of their products.
Unlike traditional 2D Amazon product pictures, 3D content adds depth and gives customers a more realistic depiction of the product by providing a view with multiple different angles. By providing potential customers a more interactive experience with your product, they’ll have a better understanding of it which can help inform their purchasing decision. If you’re thinking about utilizing the new 3D model feature, make sure your brand is enrolled in the Amazon Brand Registry.
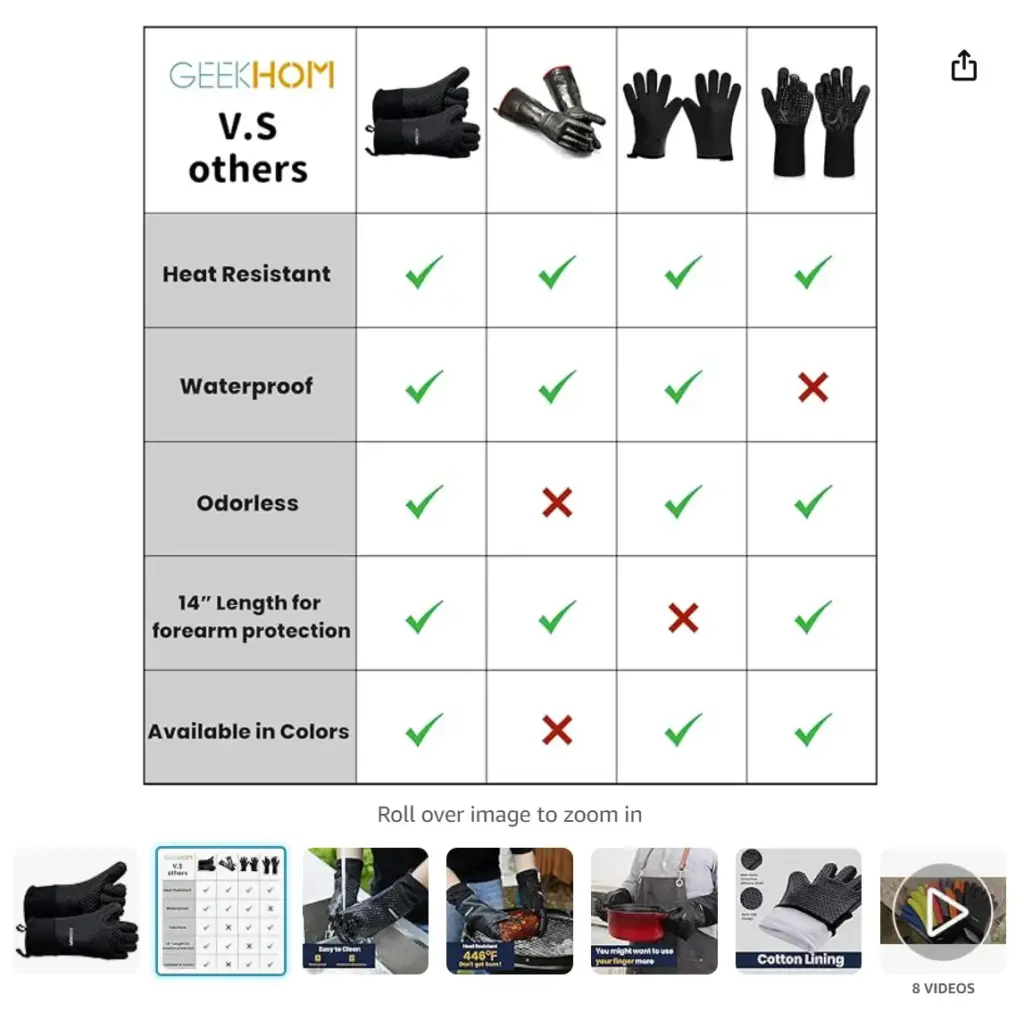
6. Comparison Charts
Amazon product photography doesn’t just include your own brand images. In fact, it can be helpful to include comparison charts to highlight certain features and benefits of your product that your competitors’ products don’t offer. After all, competition is high within the marketplace, so you’ll want to clearly differentiate to potential customers how your product is preferable over others.
When creating comparison charts, it’s up to you to decide how many additional products to include, but adding at least three or four other products is usually common. You don’t need to mention any competitor brands in particular, but make sure to add images of similar products and a list of features to compare.
7. Additional Images
Amazon allows you to add up to nine images in a listing, so be sure to take advantage of this and include as many images as needed to inform your customers. For example, if you feel that you need more photos to capture different angles, sizing, scale, or other product details, use this opportunity to do so. However, be cautious of using images that look overcrowded with information to avoid overwhelming and confusing customers.
DIY Product Photography Tips
Photography for Amazon products doesn’t necessarily have to be done by a professional. With a working camera, the right background and lighting, and photo editing software, you can cut back on costs and give it a try yourself. However, if you don’t have a strong background in taking photos, the process might seem a bit overwhelming since there are a number of factors to consider. Lucky for you, we’ll share some of the most common Amazon product photography tips to help get you started.
1. Prioritize Good Lighting
Lighting is one of the most important aspects of photography. Not having enough light can make your photos look too dark while having too much light can make images appear white and overexposed. You’ll want to adjust the lighting settings on your camera to find the ideal exposure and make your product look as natural as possible.
When figuring out your setup, you should choose a space that is well-lit with enough natural light. If your product is too large or has too many parts to include in the space, or if there simply isn’t enough natural light, you should consider investing in extra lighting. This can be beneficial for wider shots or if you want to even out lighting at different angles. You can find cheap ring lights or professional photography lighting sets online, which usually come with a few different lights to place at different angles.
Once you have your environment set up, you should ensure that there are no harsh shadows created by the lighting. Remember that having a white background for your product image is important, especially for the main product image. To eliminate any harsh shadows, you can simply use parchment paper to cover a lighting source.
However, for lifestyle photos and infographics, white backgrounds aren’t a necessity, so you don’t have to worry as much about shadows. The priority for these types of photos is to exercise creativity and bring as much character as possible into the pictures.

2. Find an Appropriate Background
For the main product image, you’ll need a plain white background. You can achieve this by using either white construction paper or white chart paper taped to the wall; this will give you a seamless white backdrop for your photos. People also recommend using white cloth, however this can create seams in the backdrop that might be hard to remove when you’re editing the images later on.
Infographic images can include more color, but you should still aim for solid-colored backgrounds that complement your product and packaging or brand colors. Depending on the product you’re selling, you might consider other background options too. For example, some kitchen products work well with a linen cloth or tiled backdrop to imitate the appearance of an actual kitchen setup.

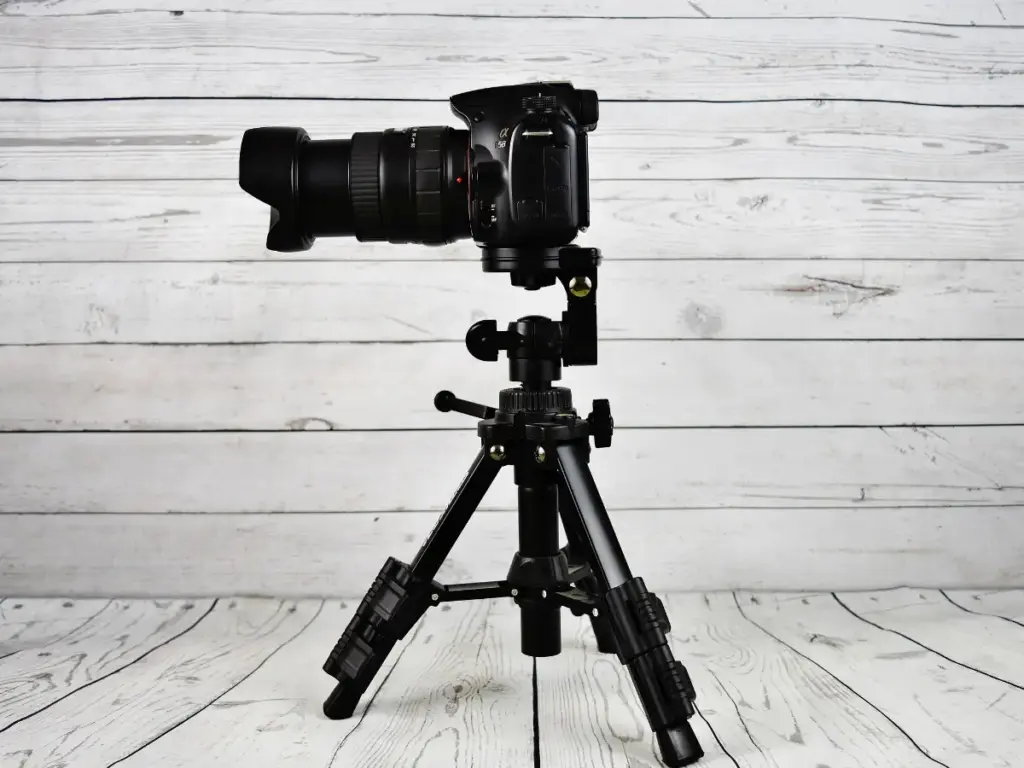
3. Invest in a Good Camera and Equipment
Good Amazon product photography can’t be achieved without the right camera and equipment. Despite what some people think, you don’t necessarily need a professional camera. In fact, many smartphones today have sufficient camera settings that will allow you to take high-quality photos.
It’s also a good idea to invest in extra camera equipment to aid the photography process. For example, tripods help to stabilize the camera and prevent possible blur in images. If you don’t have access to a tripod, you can try increasing the shutter speed on your camera to at least 1/125 to give you a clearer image.
4. Size Your Photos
Amazon photos should be sized at a minimum of 1,000 px and a maximum of 10,000 px, so ideally your images should be between 1,000 px to 2,000 px for the best definition, clarity, and zoom experience. Setting your photo size above 2,000 px will only increase load times, which can lead to photos with odd angles after automatic cropping. Conversely, setting your image size to be too small won’t allow shoppers to clearly see your product leading to customer dissatisfaction. Overall, you’ll want to find an image size that leads to faster load times without sacrificing the quality.
5. Consider Optimal Positioning and Angles
One of the best ways to highlight unique selling points and key features of your product is to play around with certain angles and positions. Depending on your product, you might consider including images of multiple different angles and positions to give your customers a comprehensive understanding of the product. For example, you might add photos of the top, bottom, and side views of your product. When taking these kinds of photos, remember to have the item cover 85% of the screen to meet the Amazon product photography guidelines.

6. Ensure High Resolution and Image Quality
Image resolution determines the level of detail and clarity. Using low-quality and blurry images on your listing can turn potential customers away since they aren’t able to clearly see your product. And as we discussed earlier, one of the Amazon product photo requirements states that images must be at least 1,600 pixels or larger on the longest side for optimal resolution and to allow for the zoom feature.
Most cameras and smartphones can capture photos in a resolution high enough to meet Amazon’s standards. If you aren’t sure what resolution your camera is at, you’ll need to look in the settings and adjust as needed. However, if your camera doesn’t have good resolution settings, you can always improve it when editing the photo.
7. Maximize the Use of Photos and Videos
Amazon allows sellers to upload a total of nine images to their listing, but the final two are not optimized for viewing (meaning they aren’t shown directly in the image carousel). Since the final two images are often not immediately seen by shoppers, it’s best to plan out six or seven quality images and one video (if you plan to have six images) on your product listing. Videos can be helpful for customers looking to get a better idea of your product, but usually only listings that have Enhanced Brand Content are able to include videos. Whatever your strategy may be, you should take advantage of the photo and video slots in your listing to provide customers with as much information as possible.
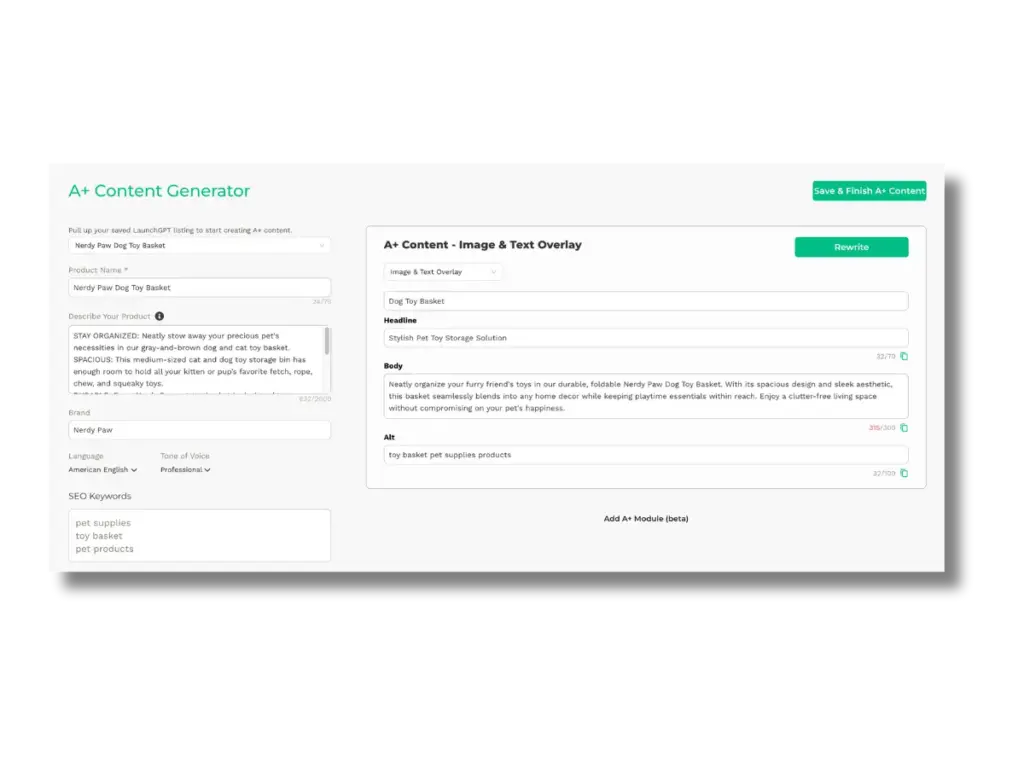
If you want to take your product listings a step further, you can utilize Amazon’s A+ Content tool. It optimizes your listing content and shares your brand’s story by showcasing your product through enhanced images, videos, customized text placements, shoppable product-comparison charts, and more. To save yourself extra time, feel free to try out Viral Launch’s A+ content generator tool which instantly creates all the text you need for your standard modules.
Pro Tip: Check out our video for more tips on how to do product photography for Amazon.
When to Outsource Product Photography
Product photography for Amazon can be complicated and time-consuming to do yourself. If you don’t have a strong background in photography and find that you’re struggling to produce quality photos, you may want to consider hiring a professional photographer. After all, product images heavily influence a shopper’s purchase decision, so you’ll need high-quality photos to appeal to a wider audience and increase the likelihood of people buying your product.
When searching for a professional photographer, it’s important that you do your research. Professional photographers are required to have certain qualifications and experience, but not every photographer shares the same skill set when it comes to the subject being photographed. For example, a fashion photographer might not have the same approach as a professional product photographer for kitchen tools.
In addition, you’ll want to find a photographer within your budget. Hiring professional photographers can be expensive depending on the number of photos you need and whether you require additional photo editing services. In general, you can expect to pay around $200 to $300 for a professional product photographer.
There are a number of ways to search for a professional product photographer, but here are just a few starter tips you can take:
- Search for local photographers – Start your search within your local area. You can do this by using online directories like Google, Yelp, Craigslist, and even social media apps such as Instagram, Facebook, and TikTok. You can also ask for referrals from friends or colleagues who have hired professional photographers before.
- Find an Amazon product photography service – If you aren’t able to find any local photographers, you can also look for a professional Amazon product photo service to ship your product to. These services specialize in creating product images that meet the Amazon product photography guidelines and can help you produce high-quality images that effectively showcase your products.
- Explore the freelancer marketplace – Freelance websites such as Fiverr or Freelancer.com are also good places to find professional product photographers for reasonable prices. These platforms allow you to read reviews from previous clients, compare rates, and browse through portfolios so you can make the best informed decision.
Once you’ve found the perfect candidate to handle your product images, make sure you clearly communicate your expectations, deadlines, and any specific requirements when hiring them. Remember that your product photos are an important aspect of your listing and can help drive conversion rates and sales, so you’ll want everything to go smoothly.
Common Product Photography Mistakes to Avoid
Product photography for Amazon isn’t easy, especially if you’re doing it yourself as a beginner. There’s a number of factors to consider such as lighting, shadows, backgrounds, and resolution. Below are some common mistakes people typically make when taking their product photos along with some tips to avoid these issues.
- Poor Lighting: Having too much light can lead to overexposed and white photos. On the other hand, not having adequate lighting can result in dark photos. If you still find your product photos not appearing correctly even with extra lighting or advanced camera settings, you can always improve the lighting with a photo editing software.
- Shadows: Shadows are heavily affected by lighting and angles, so you’ll need to adjust these settings accordingly. In most cases, you want to avoid creating heavy shadows in your photos to avoid drawing attention away from the product being photographed.
- Cluttered Backgrounds: To meet Amazon’s guidelines, main product photos should be taken against a plain white background. Therefore, you’ll want to remove any objects in the background that draw attention away from the product being photographed. For lifestyle photos, you have more creative freedom and can add supporting props in the background to make your photo more authentic and appealing.
- Low Resolution and Blurry Images: Many first-time photographers often upload low-resolution and poorly-compressed images which lead to blurry product photos. To improve the resolution of a photo, you can adjust the lighting, use a camera tripod, avoid extensive image cropping, or switch to a higher quality camera.
Final Thoughts on Amazon Product Photography
There’s a lot to remember and account for when doing product photography for Amazon. But at the end of the day, the work that goes into creating product photos is well worth it. By investing the time, energy, and money in high-quality images, sellers can significantly improve their conversion rates and sales performance. Whether you decide to hire a professional product photographer or go the DIY route, the importance of product photos should not be underestimated in the competitive Amazon marketplace.